Bread, the staff of life. When growing up, there always had to be bread in the house. Bread accessible to most families at that time was more like cotton balls formed into loaves. Simply put, good bread was hard to find. Coming from Poland where bad bread was hard to find, the absence of good bread in their new homeland was hard for my parents to swallow.
About a mile from our house was a German bakery that offered good rye bread and a full array of bakery treats for us youngsters. (Their unequaled German anise Christmas cookies are still etched in my mind and my taste buds.) Every Sunday, we’d pick up the Sunday paper and a couple loaves of fresh rye bread.
While “artisan bread” (i.e., regular bread if you’re living in Europe) is now easily found in most, if not all, supermarkets, it sure costs a hefty penny. Unless you are buying such bread in an upscale market, this artisan bread most likely has a strange, industrial aftertaste. Have no fear, making artisan bread at home–the crusty, delicious kind–is well within the reach of every homebaker. Many thanks to Mark Bittman, who brought us the famous New York Times article about Jim Lahey’s “no-knead” bread. He freed me from my supermarket bread purgatory!
Equipment is needed though. No, not a bread machine! Instead, a cast iron, enameled dutch oven or a clay baker that can withstand temperatures of up to 500⁰F, but no less than 450⁰F. Make sure the lid is also oven-proof.
Breadtopia is a great website for bread making supplies. The dutch oven suitable for temperatures of up to 500⁰F that I have used for a number of years is made by The Lodge. I also have a dutch oven by Martha Stewart, but it only can go up to 450⁰F.
Also in my supply cabinet for bread making is a rattan proofing basket, but this is not required. It just makes things infinitely easier, and the cost is pretty cheap. You can find one for as low as $6-7 on Amazon.com.

Back to business. To make a loaf of REAL bread, a small amount of baker’s yeast is needed, a little salt, a lot of flour, some water, and a whole lot of time. Not time for kneading the dough, but time for the dough to rise. You need to plan on about 10-18 hours for the first rise (though even 8 hours still works just fine), and then another 2 hours for the second rise.
This is what the dough looks like after an 18 hour rise. It’s all bubbly and yeasty-smelling.

I then scrape this dough with a stiff spatula (that came with my Cuisinart mini food processor) onto a floured board. The dough is pretty sticky, so I use my spatula to fold over the dough, getting the air bubbles out. I imagine this blob to have four corners, and I fold over each corner to the center. I then flip it over and form it into a nice ball and turn it on the board once around, as if to form a flat bottom.

I put the ball into my proofing basket for the second rise. Before I got the basket, I just left it on the board and covered it with a large bowl for the second rise. It was difficult to transfer to the dutch oven when it was time to bake, so I suggest putting the dough in a medium-size bowl lined with a kitchen towel if you don’t have a proofing basket. The ball should have flour dusted all over it so it is less likely to stick later on. With the towel method, the chances of sticking are higher.

Cover the basket/bowl with plastic wrap and let the dough rise a second time, for two hours.

About 20 minutes before the two hours are up, preheat your oven to 500⁰F/450⁰F with the empty dutch oven–lid and all–in the oven. The dutch oven needs to be super hot when the bread dough is plopped into it. Steam will be released and make an unbeatable crust, so don’t miss this step!
At the end of the 2 hour rise when the oven is fully preheated, remove the dutch oven from the oven (using oven mitts!!), put it on a protected counter, remove the lid (using oven mitts!!), and turn over the dough into the pot. Cover, and return it to the oven. Set your timer to 30 minutes (if at 500⁰F) or 40 minutes (if at 450⁰F).

After the timer goes off, open up the oven and remove the lid from the dutch oven (using oven mitts!!), and close the oven door. Let the bread bake for a few minutes more so that the outside crust develops a nice brown color. If you miss this step, you’ll have bread that is just too blond. The crumb is nice and chewy and has some nice holes–but not too big, so it’s perfect for sandwiches.

Another tip that I should have mentioned when talking about preheating the oven: make sure the rack is placed in the upper third of the oven. If you don’t, you might get an over-baked bottom crust. This is how my crust turned out:
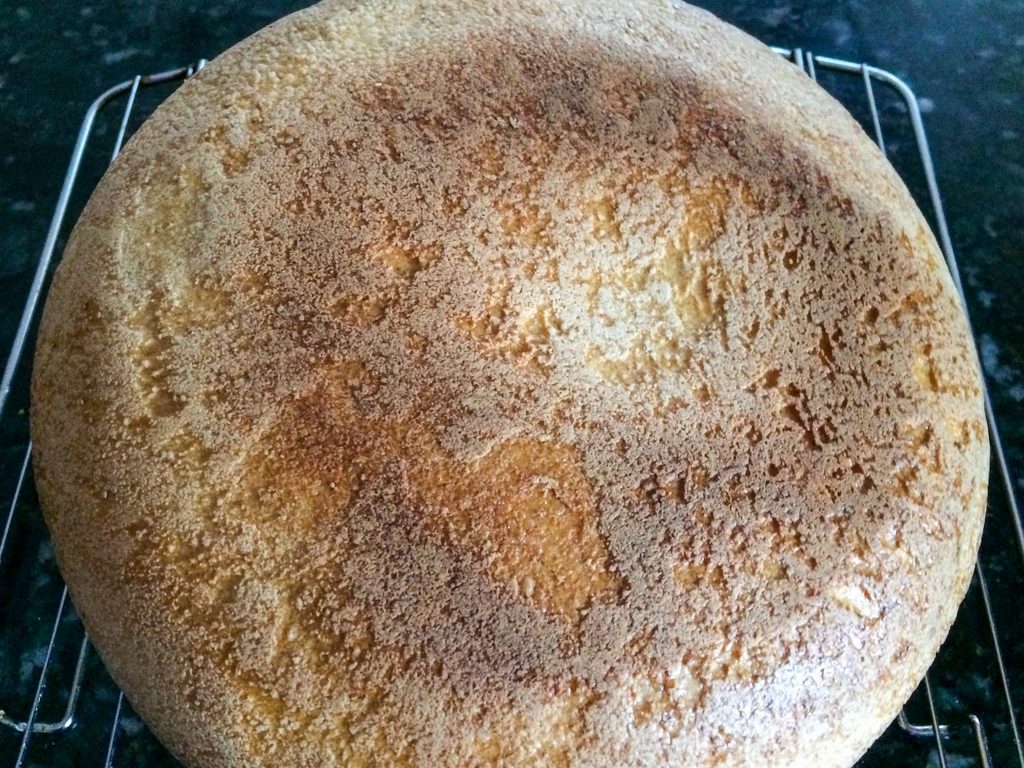
We let it cool before slicing.

Once you get the hang of making this bread, buying bread from the store will be the exception rather than the rule!

| Prep Time | 20 minutes |
| Cook Time | 1 hour |
| Passive Time | 16-20 hours |
| Servings |
2.5 pound boule (round loaf)
|
- 3 heaping cups bread flour (all-purpose or high gluten flour can also be used)
- 1 cup whole wheat flour
- 1/2 teaspoon active dry yeast (not instant or rapid rise yeast)
- 2 rounded teaspoons salt
- 2 to 2 1/2 cups tepid water
Ingredients
|
|
- Special equipment: a 4.5 quart (4.3 liter) heavy enameled, cast-iron, oven-proof dutch over (casserole) with an oven-proof lid that can withstand temperatures of 450°F-500°F.
- In a large stainless steel, glass, or plastic bowl, combine white and whole wheat flours, yeast, and salt. Briefly mix by hand.
- Pour 2 cups of water into the middle of the flour mixture. Mix with your hand. If too dry, add more water, 1/4 cup at a time. Dough should be a little sticky, but if too sticky, add some more flour, a tablespoon at a time. If dough is too stiff, add a little bit more water.
- Knead dough in the bowl for about 5 minutes and form a ball. Cover the bowl with plastic wrap and let the dough rise at room temperature for at least 8 hours and up to 18 hours.
- After rising, scrape the dough out of the bowl and onto a well-floured board or countertop. Fold the dough over a few times to get the air bubbles out. Form into a ball. Turn the ball on the surface a few times, flattening the bottom.
- Transfer to a medium-size bowl lined with a well-floured kitchen towel or, preferably, transfer to a proofing basket. Cover with plastic wrap. Let rise for 1 1/2 to two hours at room temperature. [To test whether the dough is ready to bake: Poke dough lightly with your fingertip. If dough doesn't spring back right away but stays indented, it should be ready to bake.]
- Prior to the end of the second rise described in the previous step, preheat the oven with an empty enameled cast-iron dutch oven, covered, at 500⁰F/450⁰F, depending on the dutch oven (see beginning of instructions). If possible, place the rack in the upper third of the oven.
- After the second rise is complete, remove preheated pot from the oven and uncover. Carefully turn over your dough into the pot, slash top with a sharp knife or razor (optional), put the lid back on the pot, and place the pot back into the oven. Bake for 30 minutes (if oven set at 500⁰F) or 40 minutes (if oven set at 450⁰F).
- Take cover off and continue baking for another 7 minutes, or until crust is nicely browned. Remove pot from the oven and flip over the bread onto a rack to cool.