

I have been to quite a number of Polish festivals and other events in the United States over the years and there is one dish that is consistently served to guests: pierogi. Merriam-Webster’s dictionary defines pierogi as: “a case of dough filled with a typically savory filling (as of meat, cheese, or vegetables) and cooked by boiling and then panfrying.” When we visited Krakow, Poland last summer, we came across (and ate in) a couple of pierogi houses and also “bar mleczny” (milk bars) that prepare mountains of pierogi. Hands down, the best pierogi we had during our trip were at my husband’s cousin’s house. In fact, I’m pretty much convinced that the best pierogi you’ll ever eat are those that come out of a home kitchen!
The most Polish of all fillings is sauerkraut and mushroom, but here in the U.S., I most commonly see “Ruskie” (i.e., Ruthenian) pierogi which are potato and cheese-filled pierogi. In third place are cherry or blueberry pierogi, and in fourth place are meat-filled pierogi. Standing on their own are special pierogi called “uszka” served during Christmas Eve supper with a special beet soup (“czysty barszcz czerwony wigilijny”). These pierogi are shaped sort of like ears and are filled with wild mushrooms.
I firmly believe pierogi rise and fall depending on the dough. The dough should be pretty thin when rolled out and quite tender when cooked. Making the dough at home is a snap. [It’s the rest of the process that takes up most of the time.] I’ve tried all kinds of pierogi dough recipes, including ones that add in sour cream, are made with only warm milk and flour, or use oil and water. What I come back to again and again is the most basic and traditional recipe of all, which is simply flour, egg, water, and a touch of salt.
Following is the recipe to make this type of pierogi dough. The recipe is deceptively long, and that is because I also include instructions on rolling out the dough, filling the pierogi, and cooking (boiling) the pierogi. I also include suggestions for fillings in the Notes section. If you’d like a step-by-step tutorial with photos, meet me after the recipe.
")
| Servings |
pierogi
|
- 2 cups all-purpose flour
- 1/4 teaspoon salt
- 1 large egg
- 1/2 cup hot water [reducing hot water by 1-2 tablespoons and replacing with cream will make the dough more tender; might need to use slightly more cream than 1-2 tablespoons to compensate]
- 1 tablespoon vegetable oil (e.g., olive or canola oil) [does not change if recipe is doubled]
Ingredients
|
|
- Bring a pot or kettle of water to a boil. Pour the amount of water needed to make dough into a measuring cup. Let water cool until it is still very hot to the touch (but not so hot that it burns you), about 5-7 minutes.
- Just before water is ready to use, combine flour and salt in a large bowl. Make a well in the center of flour and drop in egg. With a fork or your hand, mix egg into flour so that egg is evenly distributed throughout flour to the extent possible. Pour the hot water over flour mixture and immediately mix in with hand. Knead dough into a ball. Continue to knead dough on counter until smooth and elastic, about an additional 5 minutes. Cover dough with upside down bowl. Let dough rest covered on counter at room temperature for about 10-20 minutes before rolling out and filling. [However, if not using immediately, wrap dough in plastic wrap and refrigerate until needed, up to 3 days. Bring dough to room temperature before rolling out.]
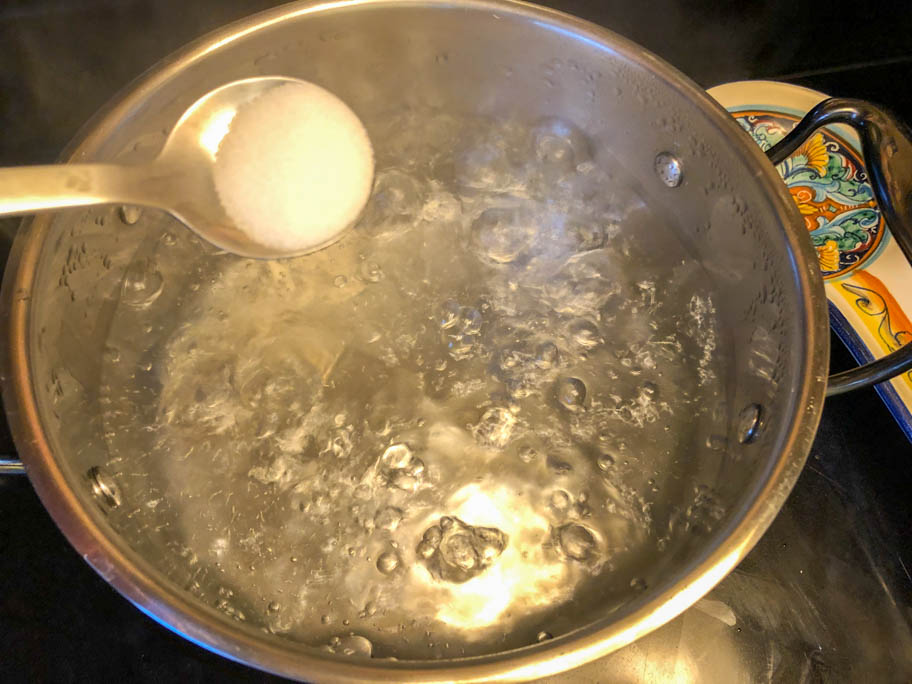
- Bring a large, 8 quart stockpot of water to a boil (fill about 3/4 pot with water). Add salt, around 1 1/2 teaspoons or to taste (similar to cooking pasta), and 1 tablespoon of vegetable oil. [These proportions remain the same if recipe for dough is doubled.] Reduce heat to maintain a slow, rolling boil. While pot of water is being prepared, roll out and fill pierogi.
- Prepare pierogi: Cut off 1/3 of dough. Place remainder under an upside down bowl. Flour rolling pin, countertop or wooden board, and top of dough to be rolled out. Carefully roll out dough until thin, just short of 1/8 of an inch/3 mm, flipping over several times in between rolling to achieve this result (i.e., roll out, flip over, roll again, flip over, roll again, etc.). If dough starts to stick during this process, lightly flour countertop or board and rolling pin.
- Cut out circles with a wide drinking glass or cup, 3 1/4 inches (8.25 cm) in diameter. One batch makes about 8-10 circles. Remove scraps of dough from around circles and add back to remaining dough that is resting under bowl. Peel off circles from board and flip over. (You may need to stretch them a little so they keep their original size and shape.)
- Place about 1 tablespoon of desired filling* in the center of each circle. Fold one side over filling until the two edges meet. Pinch edges together to seal. Pinch a second time to ensure a good seal. [Edges must be clean and free from the filling or they will not seal. Flour fingers if dough sticks to fingers while sealing.] Place filled pierogi in one layer on floured board or kitchen towel and loosely cover with another floured kitchen towel to prevent dough from drying out. Raw pierogi should not touch each other or they may stick together. Repeat Steps 2, 3, and 4 to make another batch.
- After making two batches of pierogi, drop pierogi, one at a time, down the side of the pot and into the boiling water. Do not crowd pot with pierogi. Carefully stir once or twice with large slotted spoon so that pierogi do not stick to the bottom of pot. Once pierogi float to the top, cook 3 minutes more. When fully cooked, carefully lift pierogi with large slotted spoon and transfer to a colander set over a bowl to let water drain.
- Transfer drained pierogi to skillet with melted butter and coat with butter. Alternatively, transfer to serving bowl, drizzle some olive oil or melted butter and delicately mix or toss to coat pierogi. Remove remaining pierogi from pot in batches, drain in colander, and transfer to skillet or bowl. Once all pierogi have been transferred from the pot to the skillet or bowl, cover skillet or bowl while making the remaining batches. If using bowl, cover loosely with aluminum foil or upside down plate.
- Repeat steps 2 through 6 until dough has been used up. Dough usually makes 5 batches, depending on how thinly dough is rolled out.
- Serve immediately, plain or with topped with chopped, caramelized onions and chopped bacon (optional) if savory pierogi or sweet cream and sugar if sweet pierogi. Alternatively, let cool to room temperature and store in refrigerator until ready to reheat and serve. Cooked pierogi can also be frozen. Place in Ziploc gallon freezer bag in one layer wrapped in plastic wrap and freeze.
Popular fruit filling: Fill with 3 3/4 cups blueberries or cherries (pits removed and cut in half) tossed with 1-2 tablespoons bread crumbs or corn flour (optional) and 1 tablespoon sugar (optional). Makes about 47 pierogi (dough can be rolled out a little thinner).
Popular savory fillings:
Sauerkraut and mushrooms - Reconstitute 1/2 ounce (15 g) dried wild mushrooms: Place rinsed, dried mushrooms in a pot of 1 1/2 cups water overnight. Cook in the same water for 25 minutes. Rinse and squeeze extra water from one 14.5 ounce can (411g) of sauerkraut. Chop and add to pot with mushrooms and water. Cook for 30 minutes with 1 bay leaf and 2 whole allspice berries. Stir occasionally. If necessary, add a little water while cooking to prevent burning; however, there should be no liquid left after cooking is done. While sauerkraut is cooking, sautee 2 finely chopped medium onions. Optional: Sautee 1 cup finely chopped fresh mushrooms in a separate skillet. Transfer cooked sauerkraut to bowl. Remove bay leaf and whole allspice berries and discard. Remove whole wild mushrooms, chop finely, and return to bowl. Stir in onions and optional mushrooms. Add salt and pepper to taste. Cool to room temperature before using to fill pierogi.
Potato and cheese - Peel 1.5 pounds of potatoes and boil in salted water until tender. Drain. Immediately mash with 4 ounces (113g) farmer's/pot cheese (twaróg) or Philadelphia cream cheese. Sautee 1-2 onions, chopped, in butter or oil until soft and lightly browned. Mix sauteed onions into potato mixture. Add salt and pepper to taste. Let cool to room temperature before filling pierogi. (You may have leftovers of filling.)
Meat - In a food processor, process until forms a paste the following ingredients in this order: about 1 1/2 cups chopped cooked meat (e.g., turkey, chicken, pork, beef); 1 cup cooked buckwheat groats or rice (or replace with 1 cup chopped meat); 2 chopped and sauteed onions; chopped parsley (about 1-2 tablespoons); and salt and pepper to taste.
STEP-BY-STEP INSTRUCTIONS
This is what you’ll need to make the dough. Feel free to double the recipe.

First, boil some water. Measure out 1/2 a cup and let it come down in temperature until you consider it to be still “hot” but not so hot that you’ll burn yourself. This takes about 5-7 minutes. You could just use hot water from the tap, but I’ve found that the water might not be hot enough as the dough is not as easy to work with as dough made with super hot water. If it’s too hot though, you might burn yourself and you might end up with some scrambled eggs!
NEXT: While waiting for the water to cool down, in a large bowl, hand mix together 2 cups flour and 1/4 teaspoon salt.


Make a well in the center and drop in one egg. Roughly mix the egg in with a fork or with your hand until somewhat evenly distributed.


Pour the hot water over the flour.

Immediately mix the water into the flour mixture with your hand.

Mix until fully incorporated and knead until a dough ball forms.

Knead the dough in the bowl and then on a countertop until the dough is smooth and elastic. This takes about 5 minutes.


Cover the dough with a bowl on the counter. Let the dough rest at room temperature for about 10-20 minutes before rolling out and filling. If you are not planning to make pierogi immediately or within an hour or so, wrap the dough in plastic wrap, place in a Ziploc bag and place the dough in the refrigerator until needed, up to 3 days. You should bring the dough back to room temperature before rolling it out. It’s best to work with when fresh though.
Next: How to roll out, fill, seal, and cook pierogi:
Bring a large, 8 quart stockpot of water to a boil (fill about 3/4 of pot with water). Add salt, around 1 1/2 teaspoons or to taste (similar to cooking pasta) and about 1 tablespoon of olive oil or other vegetable oil. Reduce the heat so that the water is at a low boil. [This part is the same whether you are using the recipe as is or doubling it.]
At the same time you are working on the pot of water, work on making your pierogi. Cut off 1/3 of the dough. Cover the remainder with an upside down bowl to prevent the remaining dough from drying out or forming a crust. Flour the board (or counter) and a rolling pin. Lightly flour the dough ball too.

Roll out the dough until thin, just about 1/8 of an inch/3 mm. Below is a photo of me beginning to roll out the dough.

Rolling out the dough is not as easy as it sounds. What I find is that I have to roll out the dough as far as it will stretch, and then I need to flip it over and roll it again. I might need to repeat this process a few times before the dough is thin enough. The thickness should be just short of 1/8 of an inch (about 3mm). You want it as thin as possible but not too thin that you can’t fill the dough pocket without the filling bursting through the dough while you make them or in the boiling water while the pierogi are cooking.

The dough below has been fully rolled out.

Cut out circles with a wide drinking glass or cup, 3 1/4 inches (8.25 cm) in diameter. With one batch of rolled-out dough, I usually make about 8-10 circles.


Remove the dough scraps from around the circles and add them back to the rest of the dough that is resting under the bowl. Unpeel all the circles from the board and turn them over. (This step is not essential, but might make sealing the pierogi easier.) Place about 1 tablespoon of desired filling in the center of each circle, either one at a time while holding a dough circle in your hand or on all circles at once while the circles are still sitting on the board. For this demonstration, I’m using a simple filling of plain, cooked buckwheat groats. They taste better in pierogi!


With a dough circle in your hand topped with filling, fold one side over the filling until the two edges meet. You may need to stretch the dough over the filling a little bit, and you may need to push down the filling with a free finger so that the edges remain free of filling before sealing.

Pinch the two edges together to seal. Again, make sure the edges are free from any filling or you won’t be able to seal the pierogi effectively, and the filling may burst out while cooking.

Pinch up and down the edge again to make sure the pierogi will not burst open while cooking.


Place the filled pierogi on a floured board or kitchen towel and loosely cover with a floured kitchen towel. Uncooked pierogi should not touch each other or they may stick together.

Repeat the rolling out, filling, and sealing steps one more time before cooking your first batch of pierogi. I suggest cooking around 18 pierogi at a time.
In the following photos, I would like to show you a couple of other fillings. Below is a batch of meat filling made from roasted chicken breasts that I made into a paste in a food processor, along with caramelized onions, some buckwheat groats, salt, pepper, and fresh Italian parsley.

I used a heaping tablespoon of filling for the pierogi.

I pinched the edges a little differently for this batch. I folded over the pinched edge in a few places and pinched those spots to ensure a better seal. I think they look fancier this way.

And here is a filling made with farmer’s cheese mixed with chopped apple, raisins, cinnamon, and a touch of sugar.


COOKING THE PIEROGI:
To cook the pierogi, drop them, one at a time, down the side of the pot and into boiling water.

Do not add too many pierogi into the pot at once. I think 18-20 is the most you should put into the pot for one batch. Once you drop them in, they will sink to the bottom. As they cook, they float to the top. However, you should still stir the ones at the bottom a couple of times before they float up. Sometimes, they stick to the bottom of the pot so stirring will help prevent that from happening.


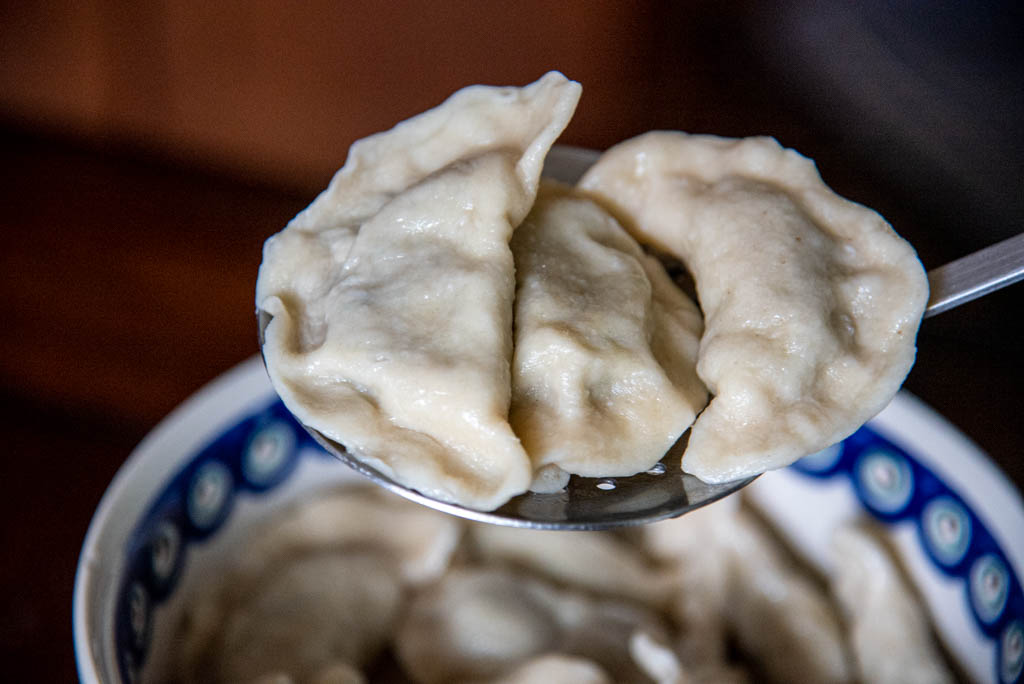
Once the pierogi float to the top, cook them 3 minutes more. When fully cooked, carefully lift a few pierogi with large slotted spoon out of the pot of boiling water and transfer them to a colander or strainer set over a bowl to let the water drain.

Transfer drained pierogi to a warm skillet with melted butter and coat them with butter. Or you can do what I did here, which was transfer them to a serving (or storage) bowl where I drizzled them with some olive oil.


Repeat this process until you’ve fished all the pierogi out of the pot. Cover the skillet or bowl before moving on to prepare the next batch of pierogis. If you have transferred the pierogi to a bowl, loosely cover the bowl with foil or an upside down plate. Add new batches of cooked pierogi to the bowl (or skillet) and be sure they are coated with some oil or butter.

Serve cooked pierogi immediately. They can be served plain (though coated in melted butter or olive oil) or with sautéed chopped onions, or both sautéed chopped onions and crispy chopped bacon. Before serving, you also might want to lightly brown/fry the pierogi in a skillet with some oil or melted butter. Personally, I like them tossed in melted butter or oil when freshly cooked and then like them fried on the skillet when reheating leftovers.
If you want to save the pierogi to eat later, let them cool to room temperature before storing them in the refrigerator. You can also freeze your cooked pierogi. Place them on a large piece of plastic wrap in one layer, cover with plastic wrap, and place them in a Ziploc gallon freezer bag and freeze.
Below is a photo of a batch of special mushroom-filled pierogi, called “uszka,” that I was cooking for Christmas Eve “Wigilia” supper.

All versions are simply delicious!


11 Comments
email me lfm904@yahoo.com
Everything looks so good. I like the pierogi. Polish recipes is what I want. Miss my mom’s and grandmother’s cooking. The best.
Wonderful! It brings back memories for me too, especially during this time of year. My job in helping my mom make pierogi many moons ago was to fill and pinch the sides before they got dropped into the pot of boiling water–and of course eating them!–Ania
My mom and I use the hot potatoe water, saved from when we drain. Plus we also have added cauliflower to the potatoes and mashed them in with the potatoes
That’s sounds fantastic! I’d like to try that out, as I bet it makes the pierogi tastier. Thanks for sharing!
Thank you !! I have always had trouble with finding a good dough. Simple is always the best. I used to help my step GMA, Izora many years ago. One memory I have never forgotten.
Wonderful – I’m glad it was a helpful recipe. One thing I tried this year was to replace up to half of the water with warm cream. I found that it made the dough more tender! Next time, I need to measure it more precisely and add it to the Notes section of the recipe.
I need more clarification for the part in the Pierogi dough recipe where you say ‘remove 1/3 of the dough for rolling out’ exactly how much dough like in ounces or lbs per batch? Also how do you keep the hot water from scrambling the eggs you combined with the flour? One more question when you give the option of replacing part of the water with warm cream can evaporated milk be used instead of the cream? thank you for taking the time to answer my questions.
I’ll try my best! For the amount to roll out for each batch, it’s really just an estimate. I take a chef’s knife or a dough scraper and eye-ball it. Once you do the first batch, you’ll see how much to adjust the next batch by factors like, how many circle cut outs you were able to make from the rolled out dough (try to get 7-8 out of a batch). It’s important to roll out the dough pretty thin, but not too thin that the filling bursts out. That’s another thing that I’ve found to be a matter of trial and error. To prevent hot water from scrambling the eggs, I mix the eggs a bit into the flour with one hand (or fork) while streaming the hot water into the flour mixture. I haven’t had a situation where the eggs have scrambled when I do it this way. The hot water shouldn’t be so hot that you burn your hand, so don’t use water that is too hot to the touch and the eggs (and your hand) will be fine. I have never tried using evaporated milk but suspect it should work OK. I think the cream helps make the dough more tender though, because of the fat in the cream. I understand some cooks use melted butter instead of cream. [I’m terribly sorry for responding to you so long after you left your comment!]
Thank you so much for this recipe. It was easy to follow and made for a really fun night with my housemates. I think we might make it a monthly tradition! All the information about different fillings and your knowledge of pierogi was very helpful.
I’m going to make more for an Epiphany party next week! Thank you for such a great recipe that made homemade pierogi approachable and not scary at all.
So glad to hear! Pierogi can be fun to make, especially with a team of helpers.